What Is inAP?
inAP automatically reads supplier PDF invoices by using either OCR (Optical Character Recognition) or scraping text directly, matches the invoice against the corresponding delivery, posts the entry into the purchase ledger and retains a copy of the PDF (within Intact iQ’s External Document Links) for enquiry purposes. Once the document has successfully been read into inAP, it can then be moved into Intact iQ where it performs in the same way as any transactions imported by EDI.
The inAP module is designed to reduce the workload when receiving many documents from one source. For example, one supplier sending hundreds of invoices. It is not a solution for processing a small batch of documents, which can be processed manually.
Key inAP Features
- Easy to use web interface
- Create user-defined templates for document recognition with advanced configuration
- Automatically match a user-defined template to a read document
- Automatically extracts PDF documents from your emails
- Automatically reads PDF documents from a shared folder
- Automatically passes the read information to Intact iQ
- Ability to view the read information by OCR in the web interface
- Drop PDFs directly into the assigned Watcher folder or wait for incoming emails on your assigned mailbox for inAP to be read
- Check your Intact iQ system to see if the document has appeared in the Purchase Invoice Register
- Log in to inDocs Server to deal with any failures
inAP Quickstart
Processing Documents
Manually place PDF files into the Watcher folder. The inAP element of inDocs will automatically check the folder for new documents and process them.
Processing Emails
inAP will monitor specified mailboxes for new pdf invoices. These will be read automatically and be processed by inAP.
Importing and Exporting Templates
To start using inAP, templates must be set up for the documents required to read into Intact iQ. Your consultant may have already set some of this up, however, you can easily set up templates for new layouts when you receive them from your suppliers.
To import Templates from another inDocs system, click on Import. This will open the Import window.
Click on Select Template file to open your file browser. Locate the *.bot file you wish to import. Once the file has been imported you can now click on the X in the top right to close it.
Exporting Templates
To export Templates from another inDocs system, select the template/s you wish to export, and a tick will appear next to each one.

Click on Export. inDocs will then download the file to your Web Browsers default download folder.

Creating, Editing and Mapping Templates
At a basic level, all fields relevant to a transaction in Intact iQ must be mapped. When creating templates, you must ensure that there is some information on there that is unique to the Supplier/Customer.
It is suggested that you use locate, and map their Company Registration Number and/or their VAT Registration number. This information will be used to link the transaction to Intact iQ once BlueEDI processes the information.
You can view a template by clicking on the edit icon.
After clicking on Edit, you will be taken to the Edit Scanned Document page, which displays the following:
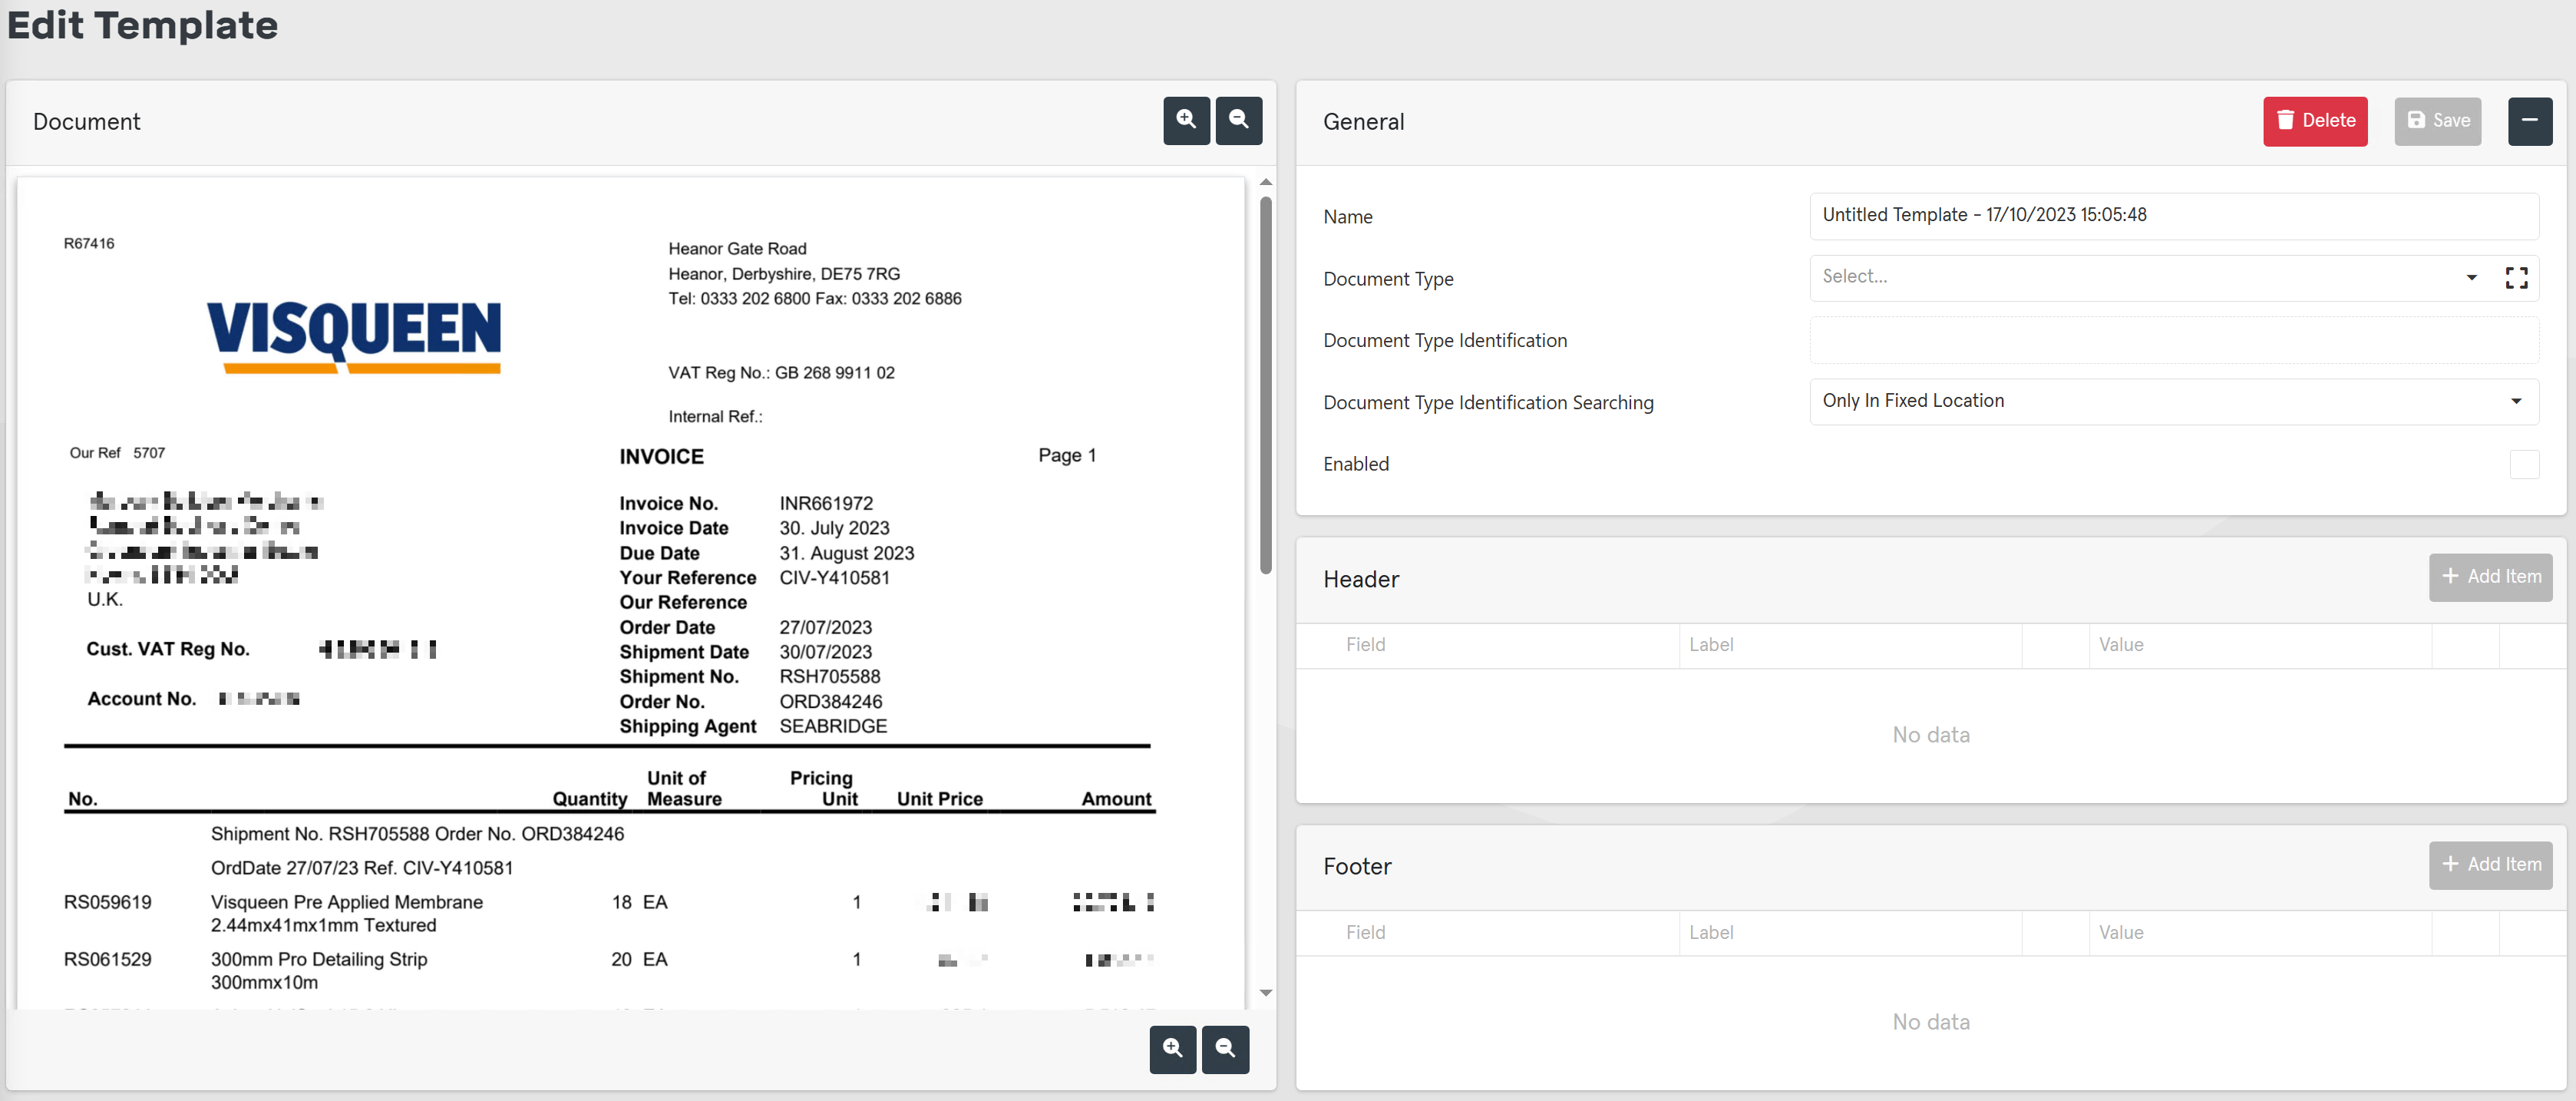
- Document view, including zoom controls. You can use the Right mouse button to drag the page around.
- General Pane:
– Delete
– Save
– Name
– Document Type
– Document Type Identification
– Document Type Identification Searching
– Enabled flag - Header and Footer Pane
The purpose of the template screen is to enable the user to identify what information will be read to identify the document, and what information will be passed to Intact iQ.
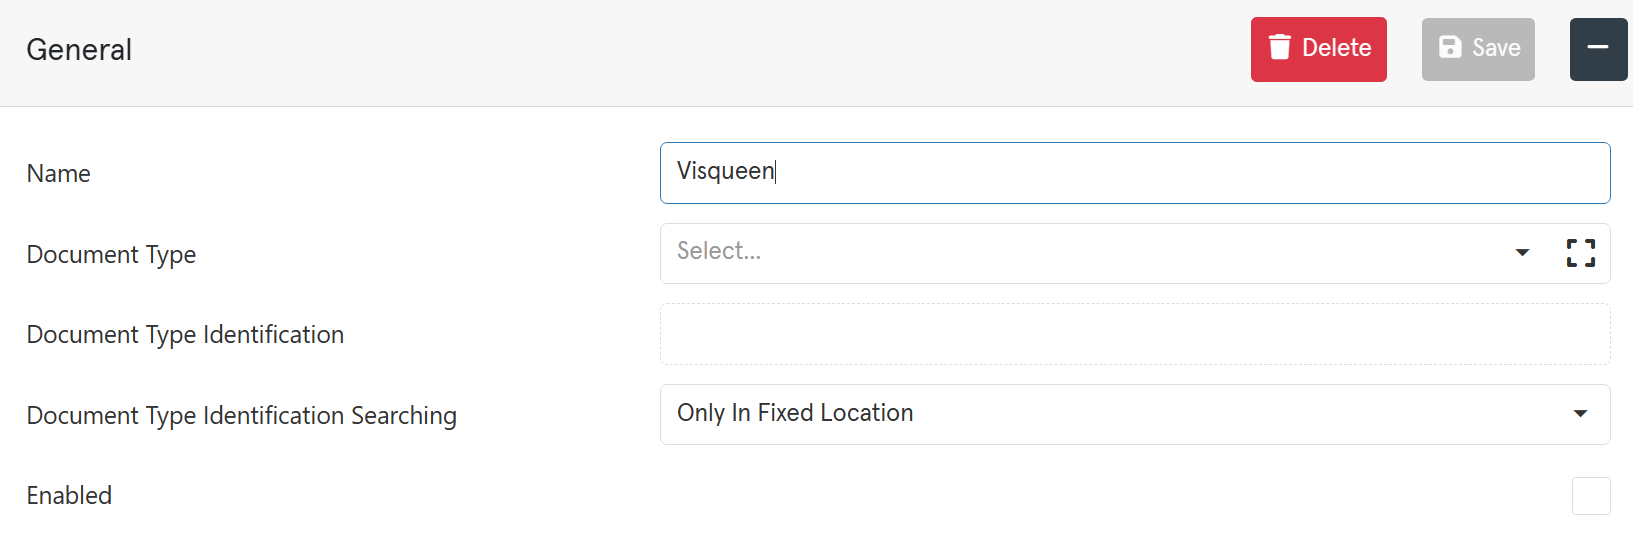
The first step to creating a new template is to give it a name.
General Pane
In the General Pane, set the Name field to something easily recognisable. In this example, we are using a Visqueen Invoice. Therefore, for the ease of recognition we will enter “Visqueen” in the Name field.
We must now set what the type it is that we want to read. This is used to separate out different types of documents, for example, if the Supplier uses similar layouts for Invoices and Credit Notes.
To do this, click on the Select… next to Document Type.
![]()
Select Purchase Invoice.
You will now need to map this against the document to help identify the type of document.
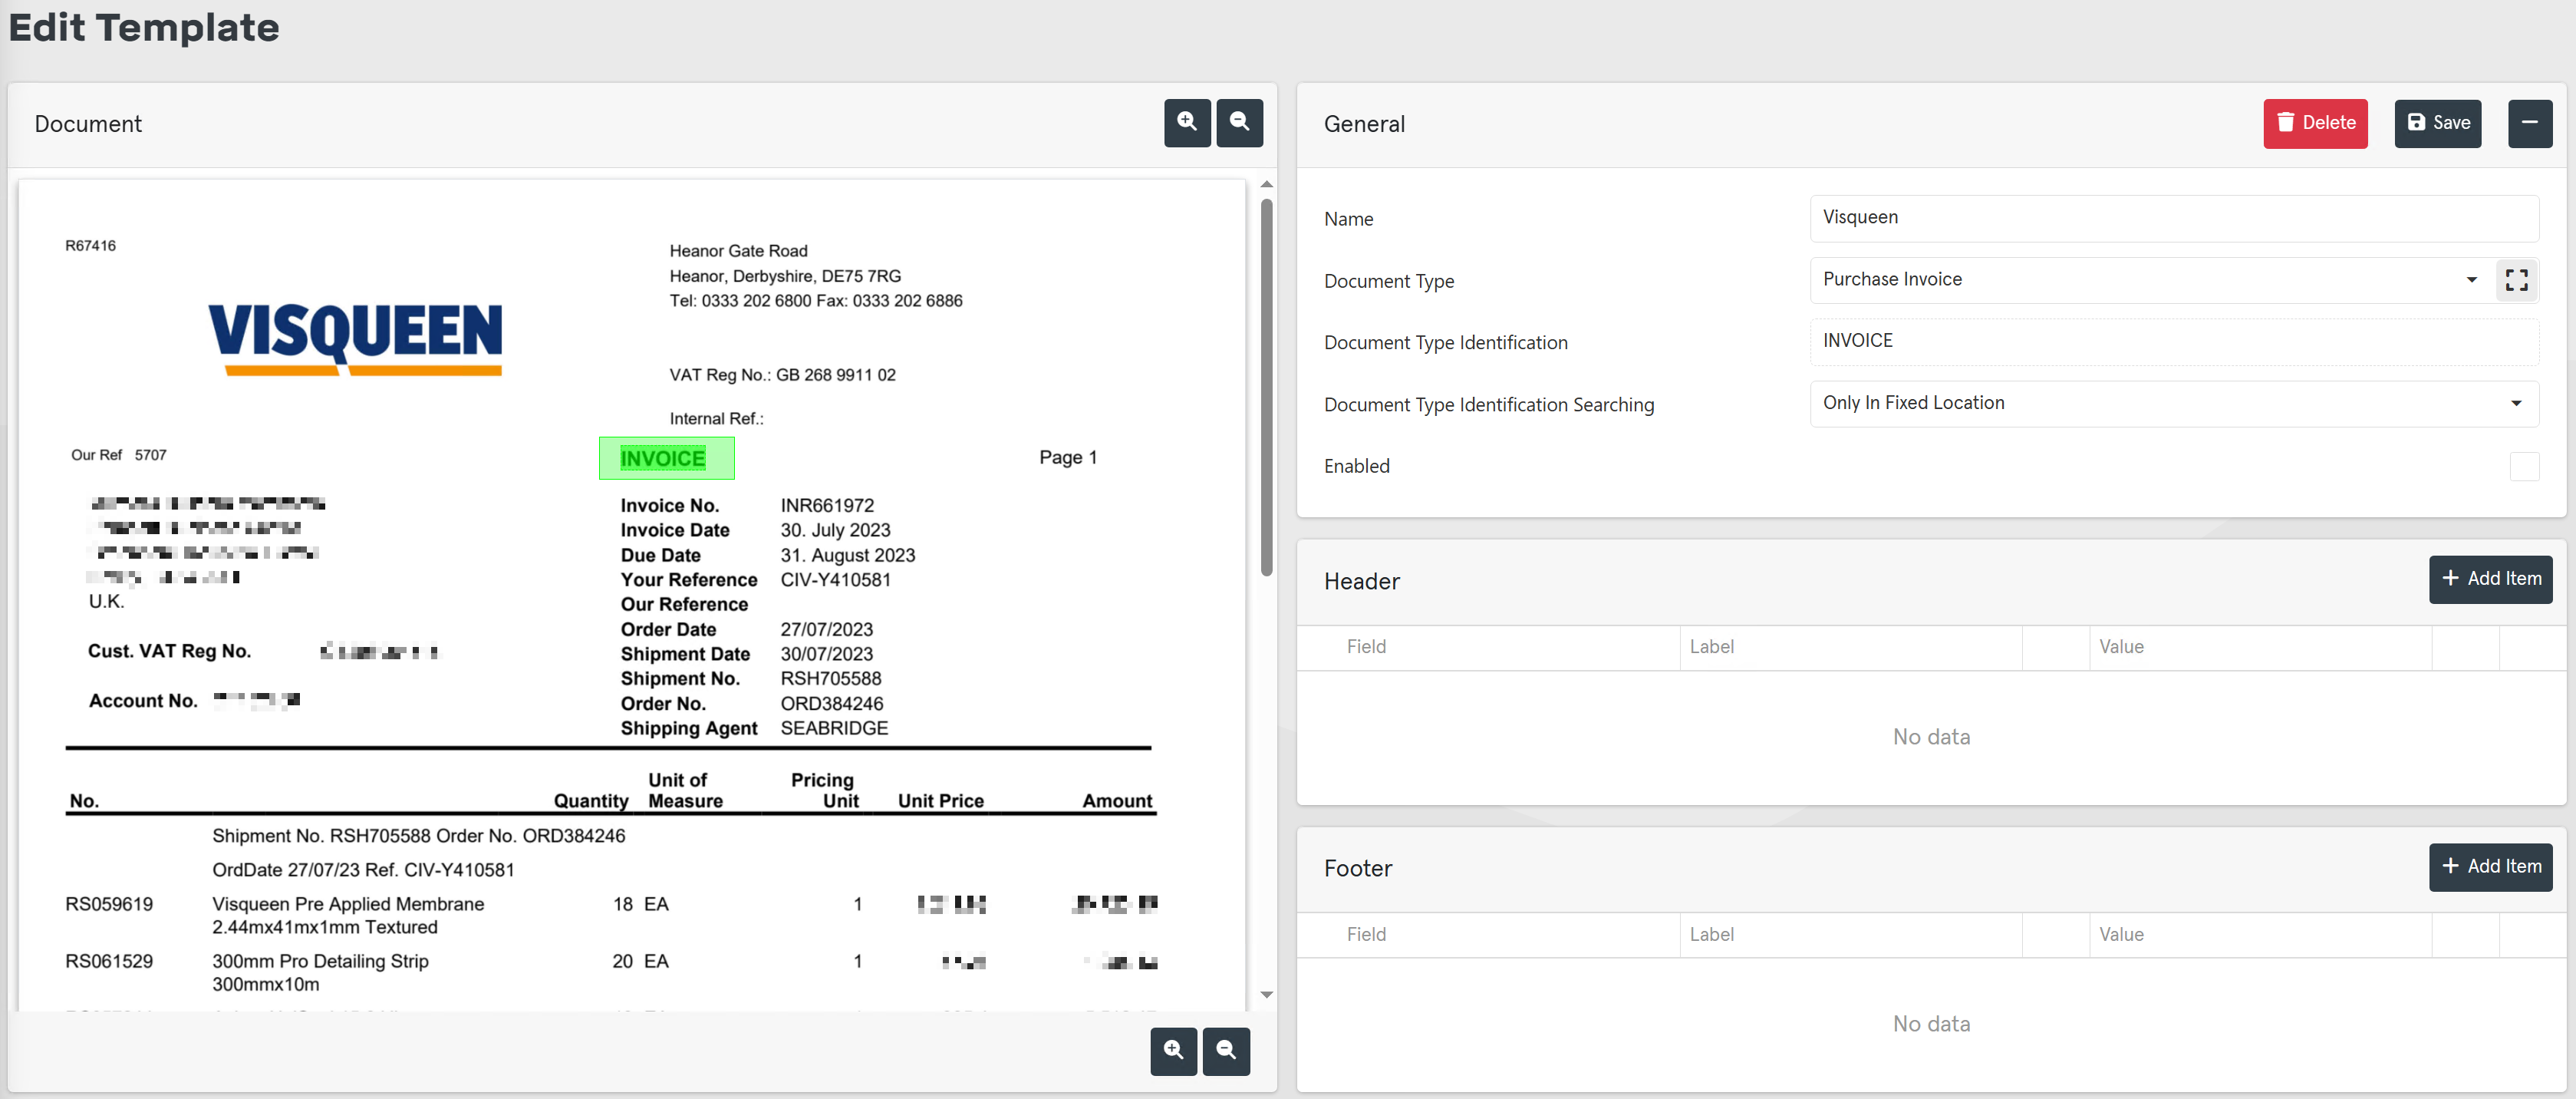
Click on the mapping button to the right of the Document Type. The mapping button will highlight in grey to show it is selected.
![]()
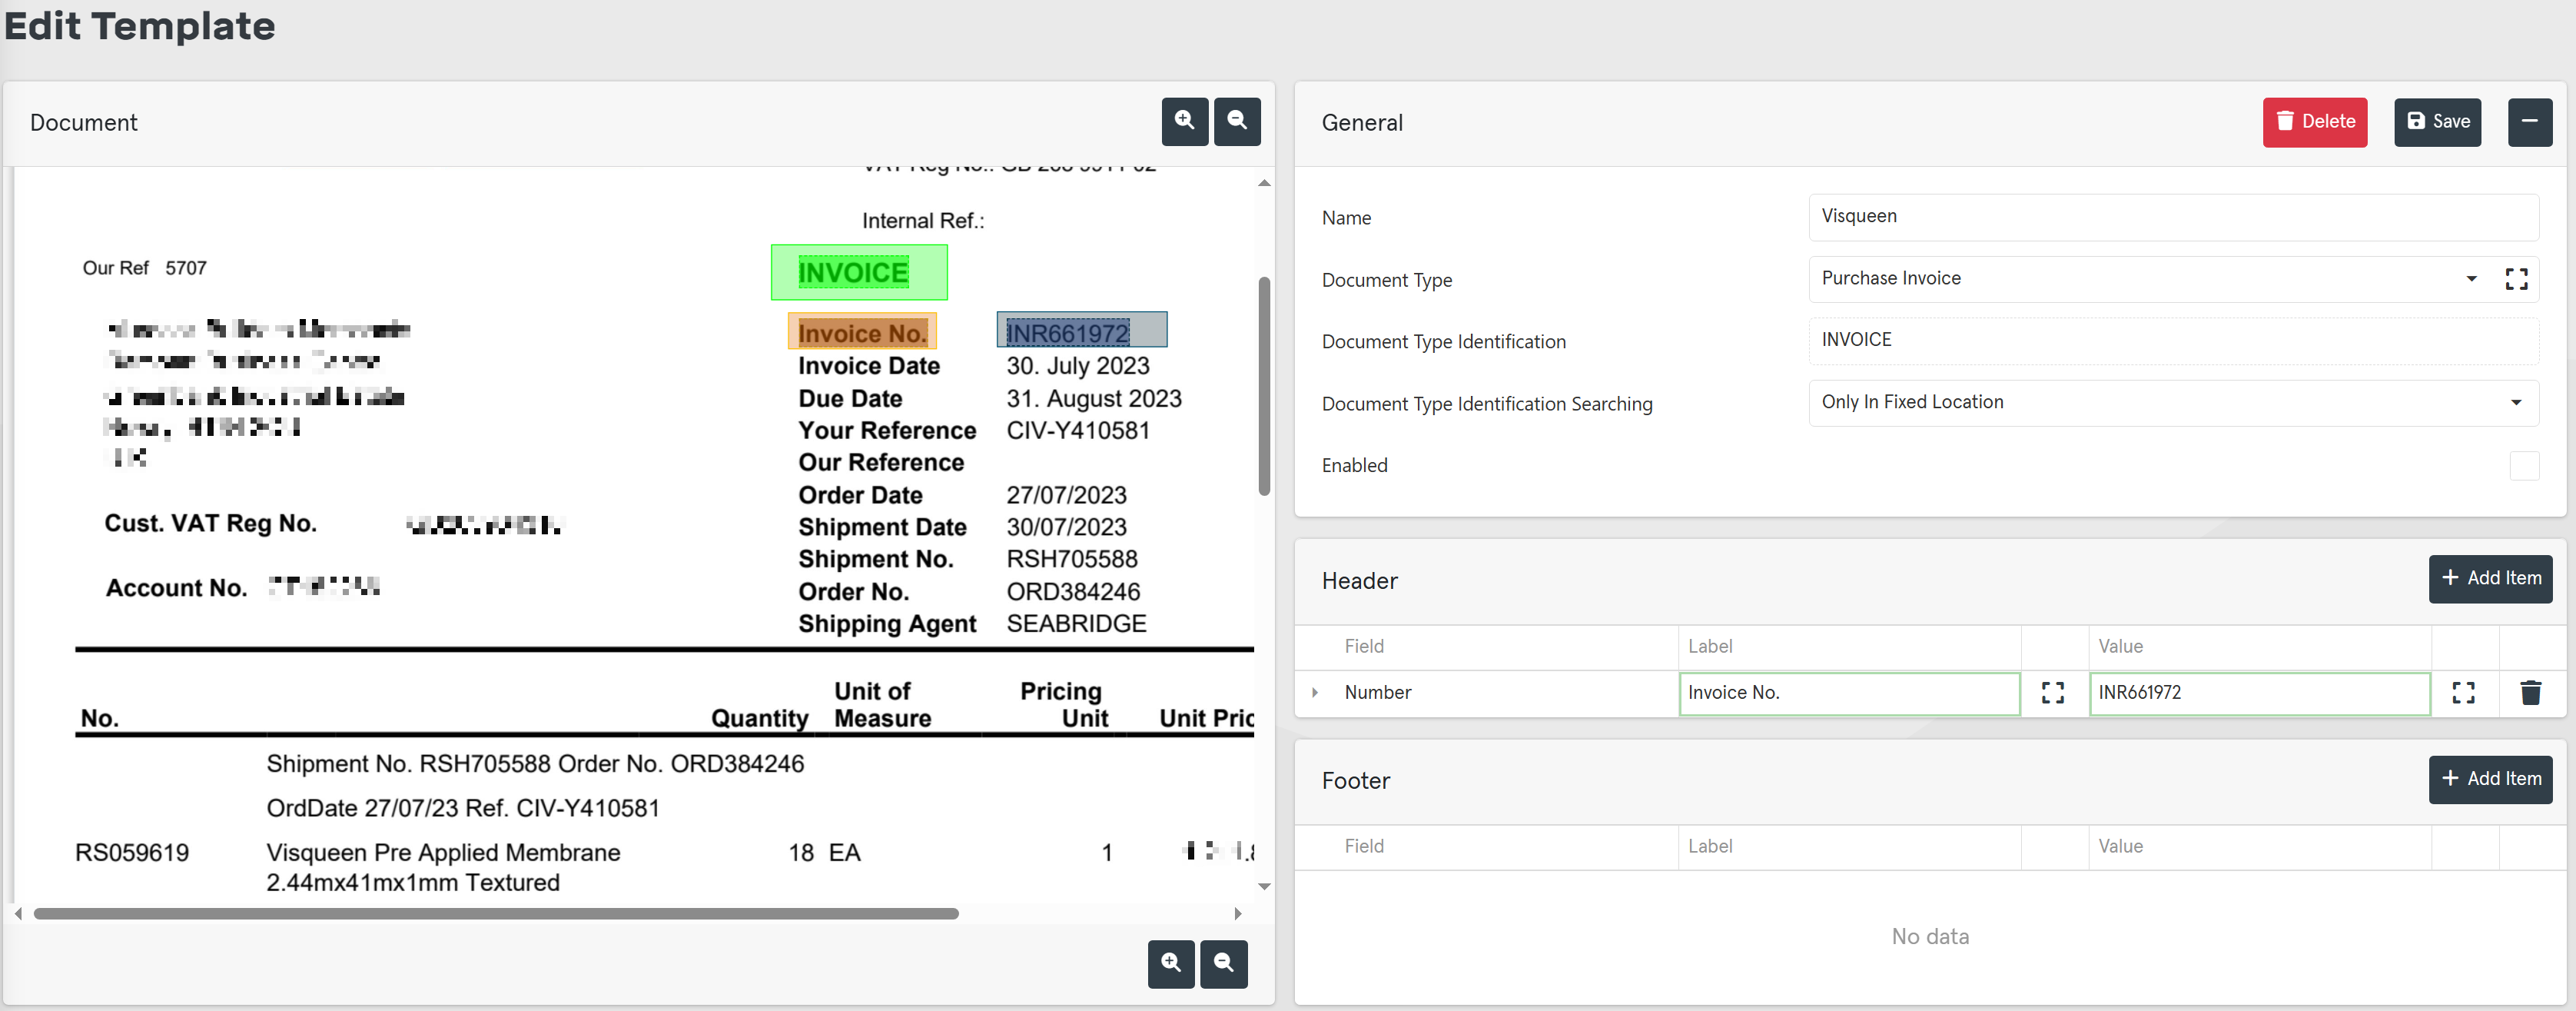
Using your left mouse button, draw a box over the title of the document in the Document Pane. For example, with the Visqueen Invoice we will draw the box over the Invoice text.

As soon as you draw the box it will stay over the text in green. The Document Type Identification field in the General Pane will display Reading until character recognition is completed. Once it has been completed, the word in the green box should now display; in this case, it now displays Invoice.
There are rare occasions where the Document Type Identification may move from page to page, whereas the rest of the document remains the same. This is when the Document Type Identification Searching can be used.
By default, this is set to Only in Fixed Location. However, it may also be set to Everywhere.
Note that this could cause issues distinguishing between Credit Notes and Invoices, i.e. if the Credit Note has the work Invoice anywhere on the document it may be misidentified as an Invoice layout.
At this stage you must save your template by clicking on save to ensure the Document Type is correctly set and to enable the Header and Footer bands.
You do not have to Enable the template just yet while you are setting up the mapping. However, if you fail to turn this on when you have completed mapping, InAP will not use the template.
Header Pane
To start selecting an item to read, click on Add Item. This will create a new list item for you to populate.
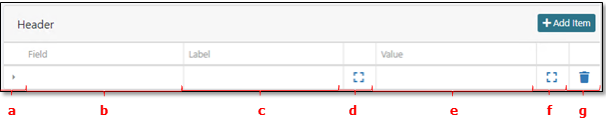
- a. See Advanced Template Field Controls (Page 49) for more details
- b. Field – This is a list of predetermined fields i.e. Number
- c. Label – This will auto populate with the text read after mapping field
- d. Mapping button for Field
- e. Value – This will auto populate with the text read after mapping value
- f. Mapping button for value
- g. Delete line
Click into the Field box to activate the Select option.

Click on Select… dropdown to display the header fields relevant to the Document type i.e., Number, Date etc.
Click on the mapping button to the right of Label…
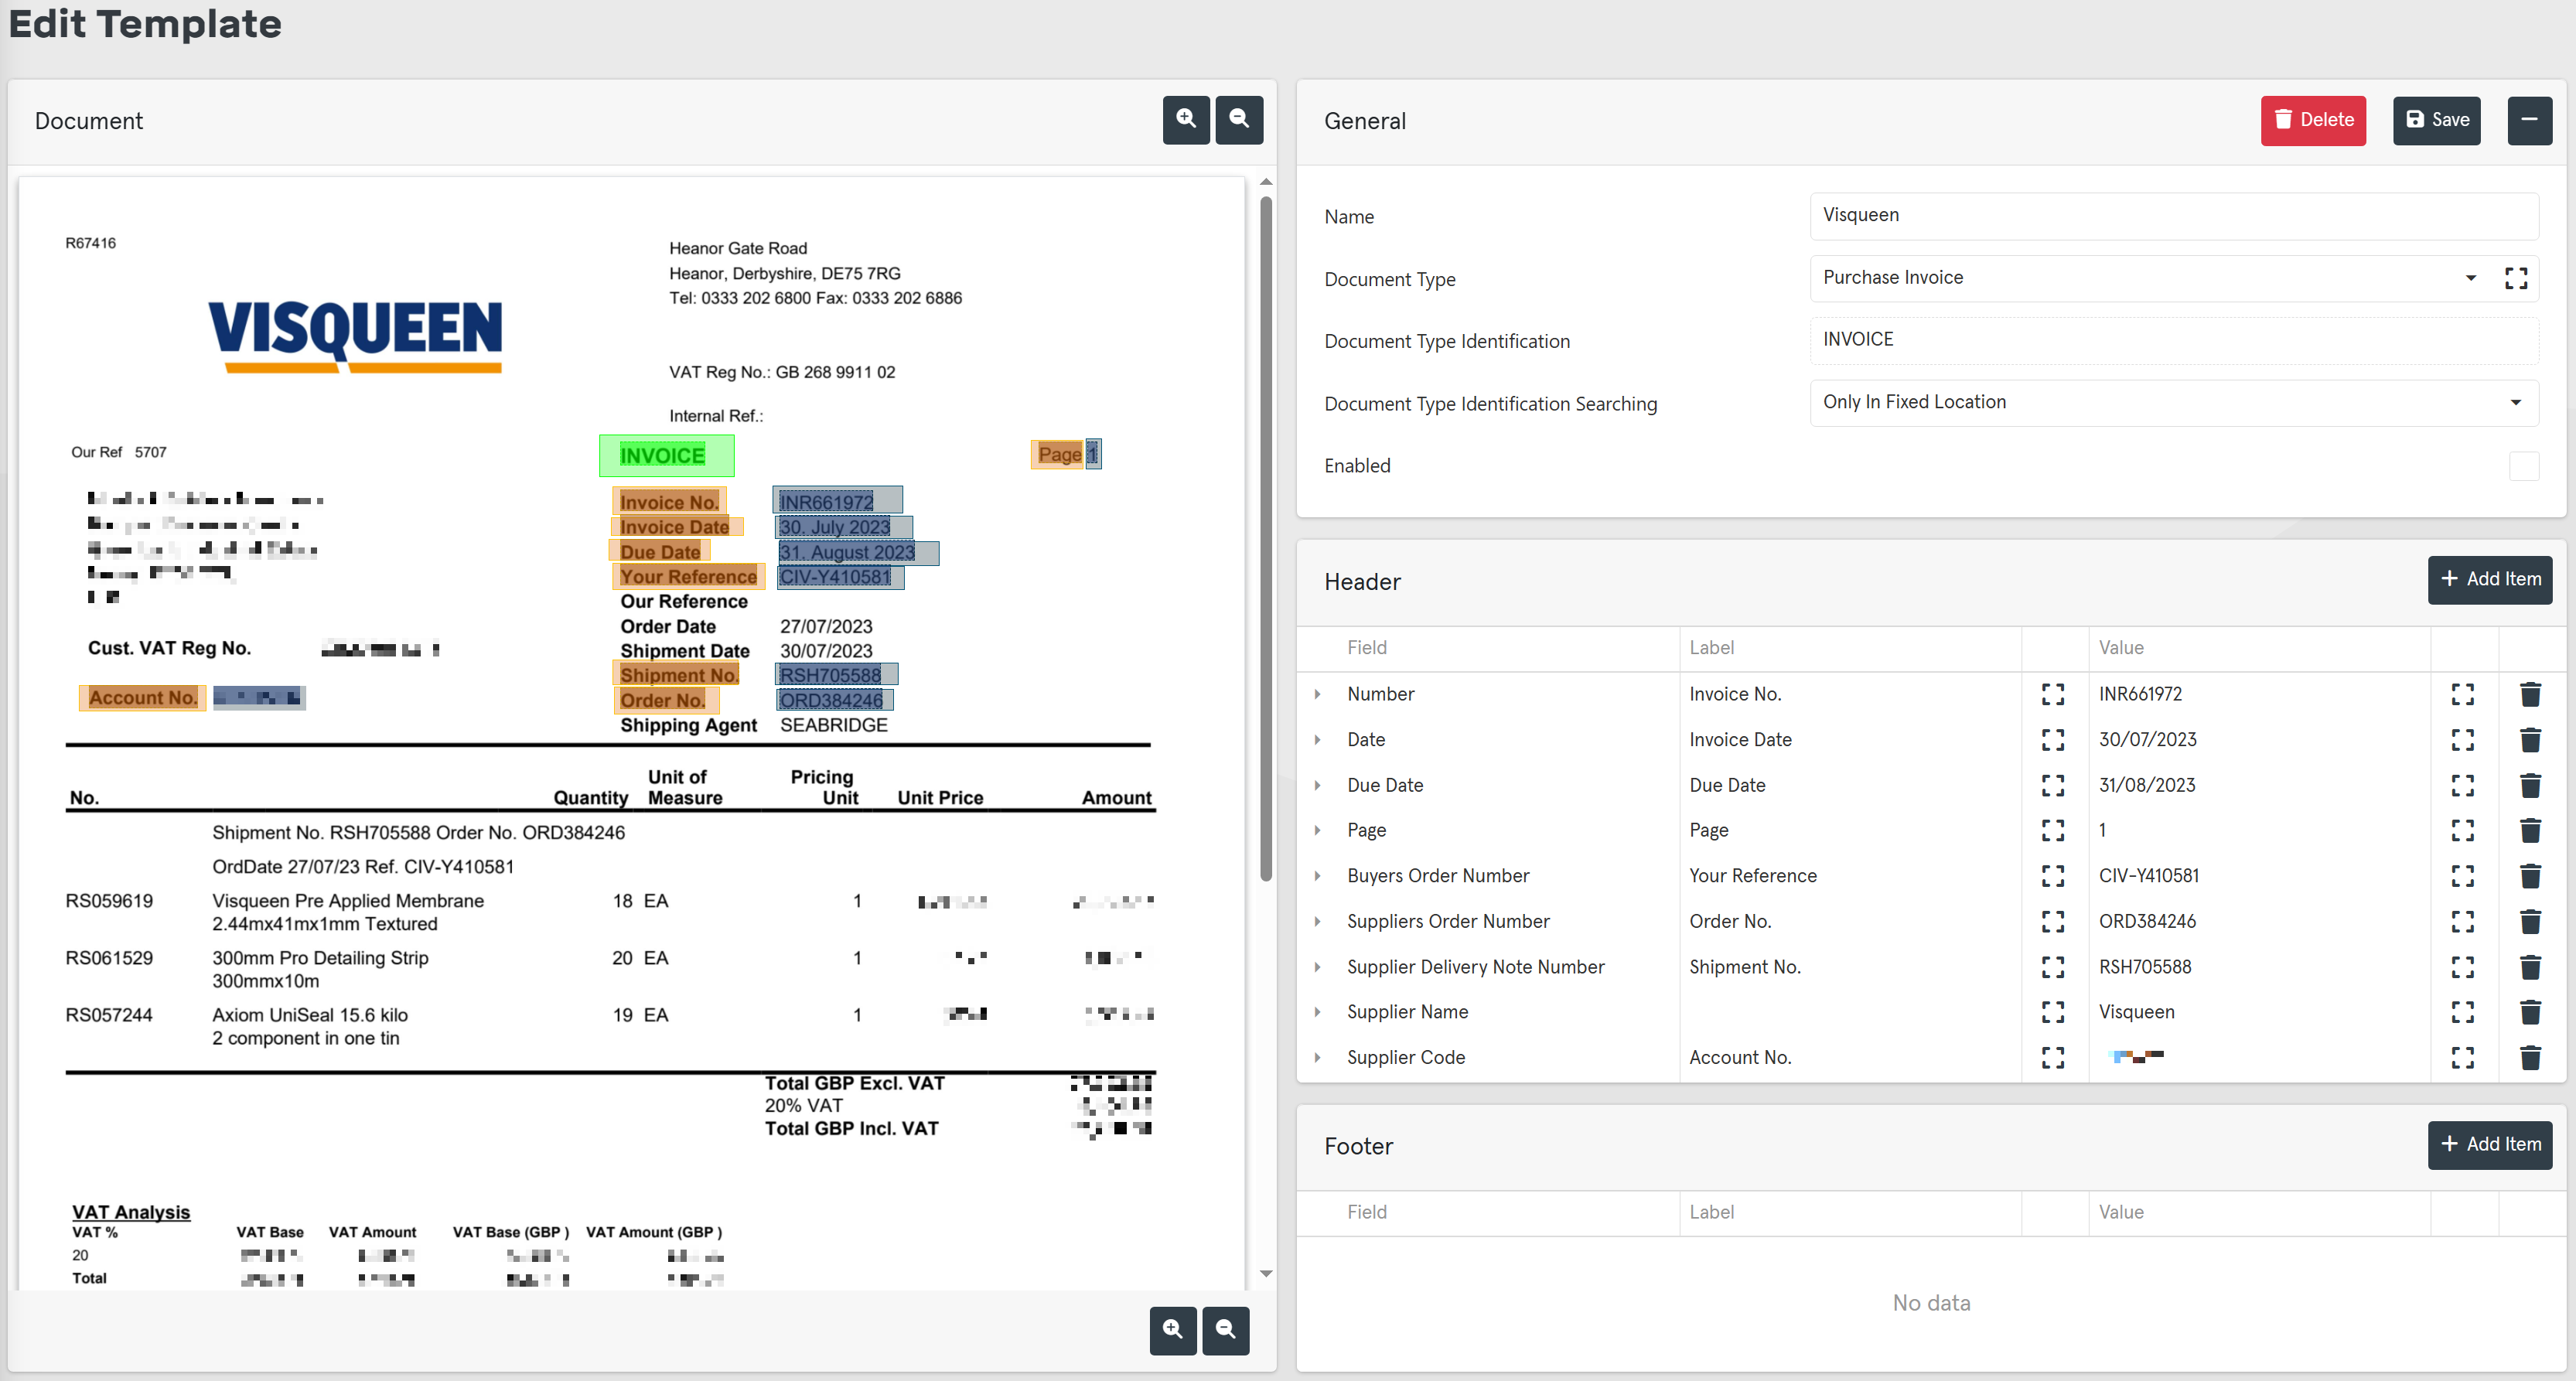
Using the left mouse button, click and drag a box over the label of the field you require. In the below example Number is the field we are linking to in Intact iQ, and the label we have mapped to is TRANSACTION NUMBER.
inAP will read the text and populate the label field.

If the read text is wrong or you have made a mistake mapping, click on the mapping button to the right of Label and try again.
Repeat the same process for the Value field, ensuring that you click on the mapping button to the right of Value, and select the information that relates to the current field.
If the read text is wrong or you have made a mistake mapping, click on the mapping button to the right of Value and try again.
Repeat this for all relevant Fields:
Note: There may be some fields that using a Label is not relevant such as Supplier Name. In this instance just map the Value.
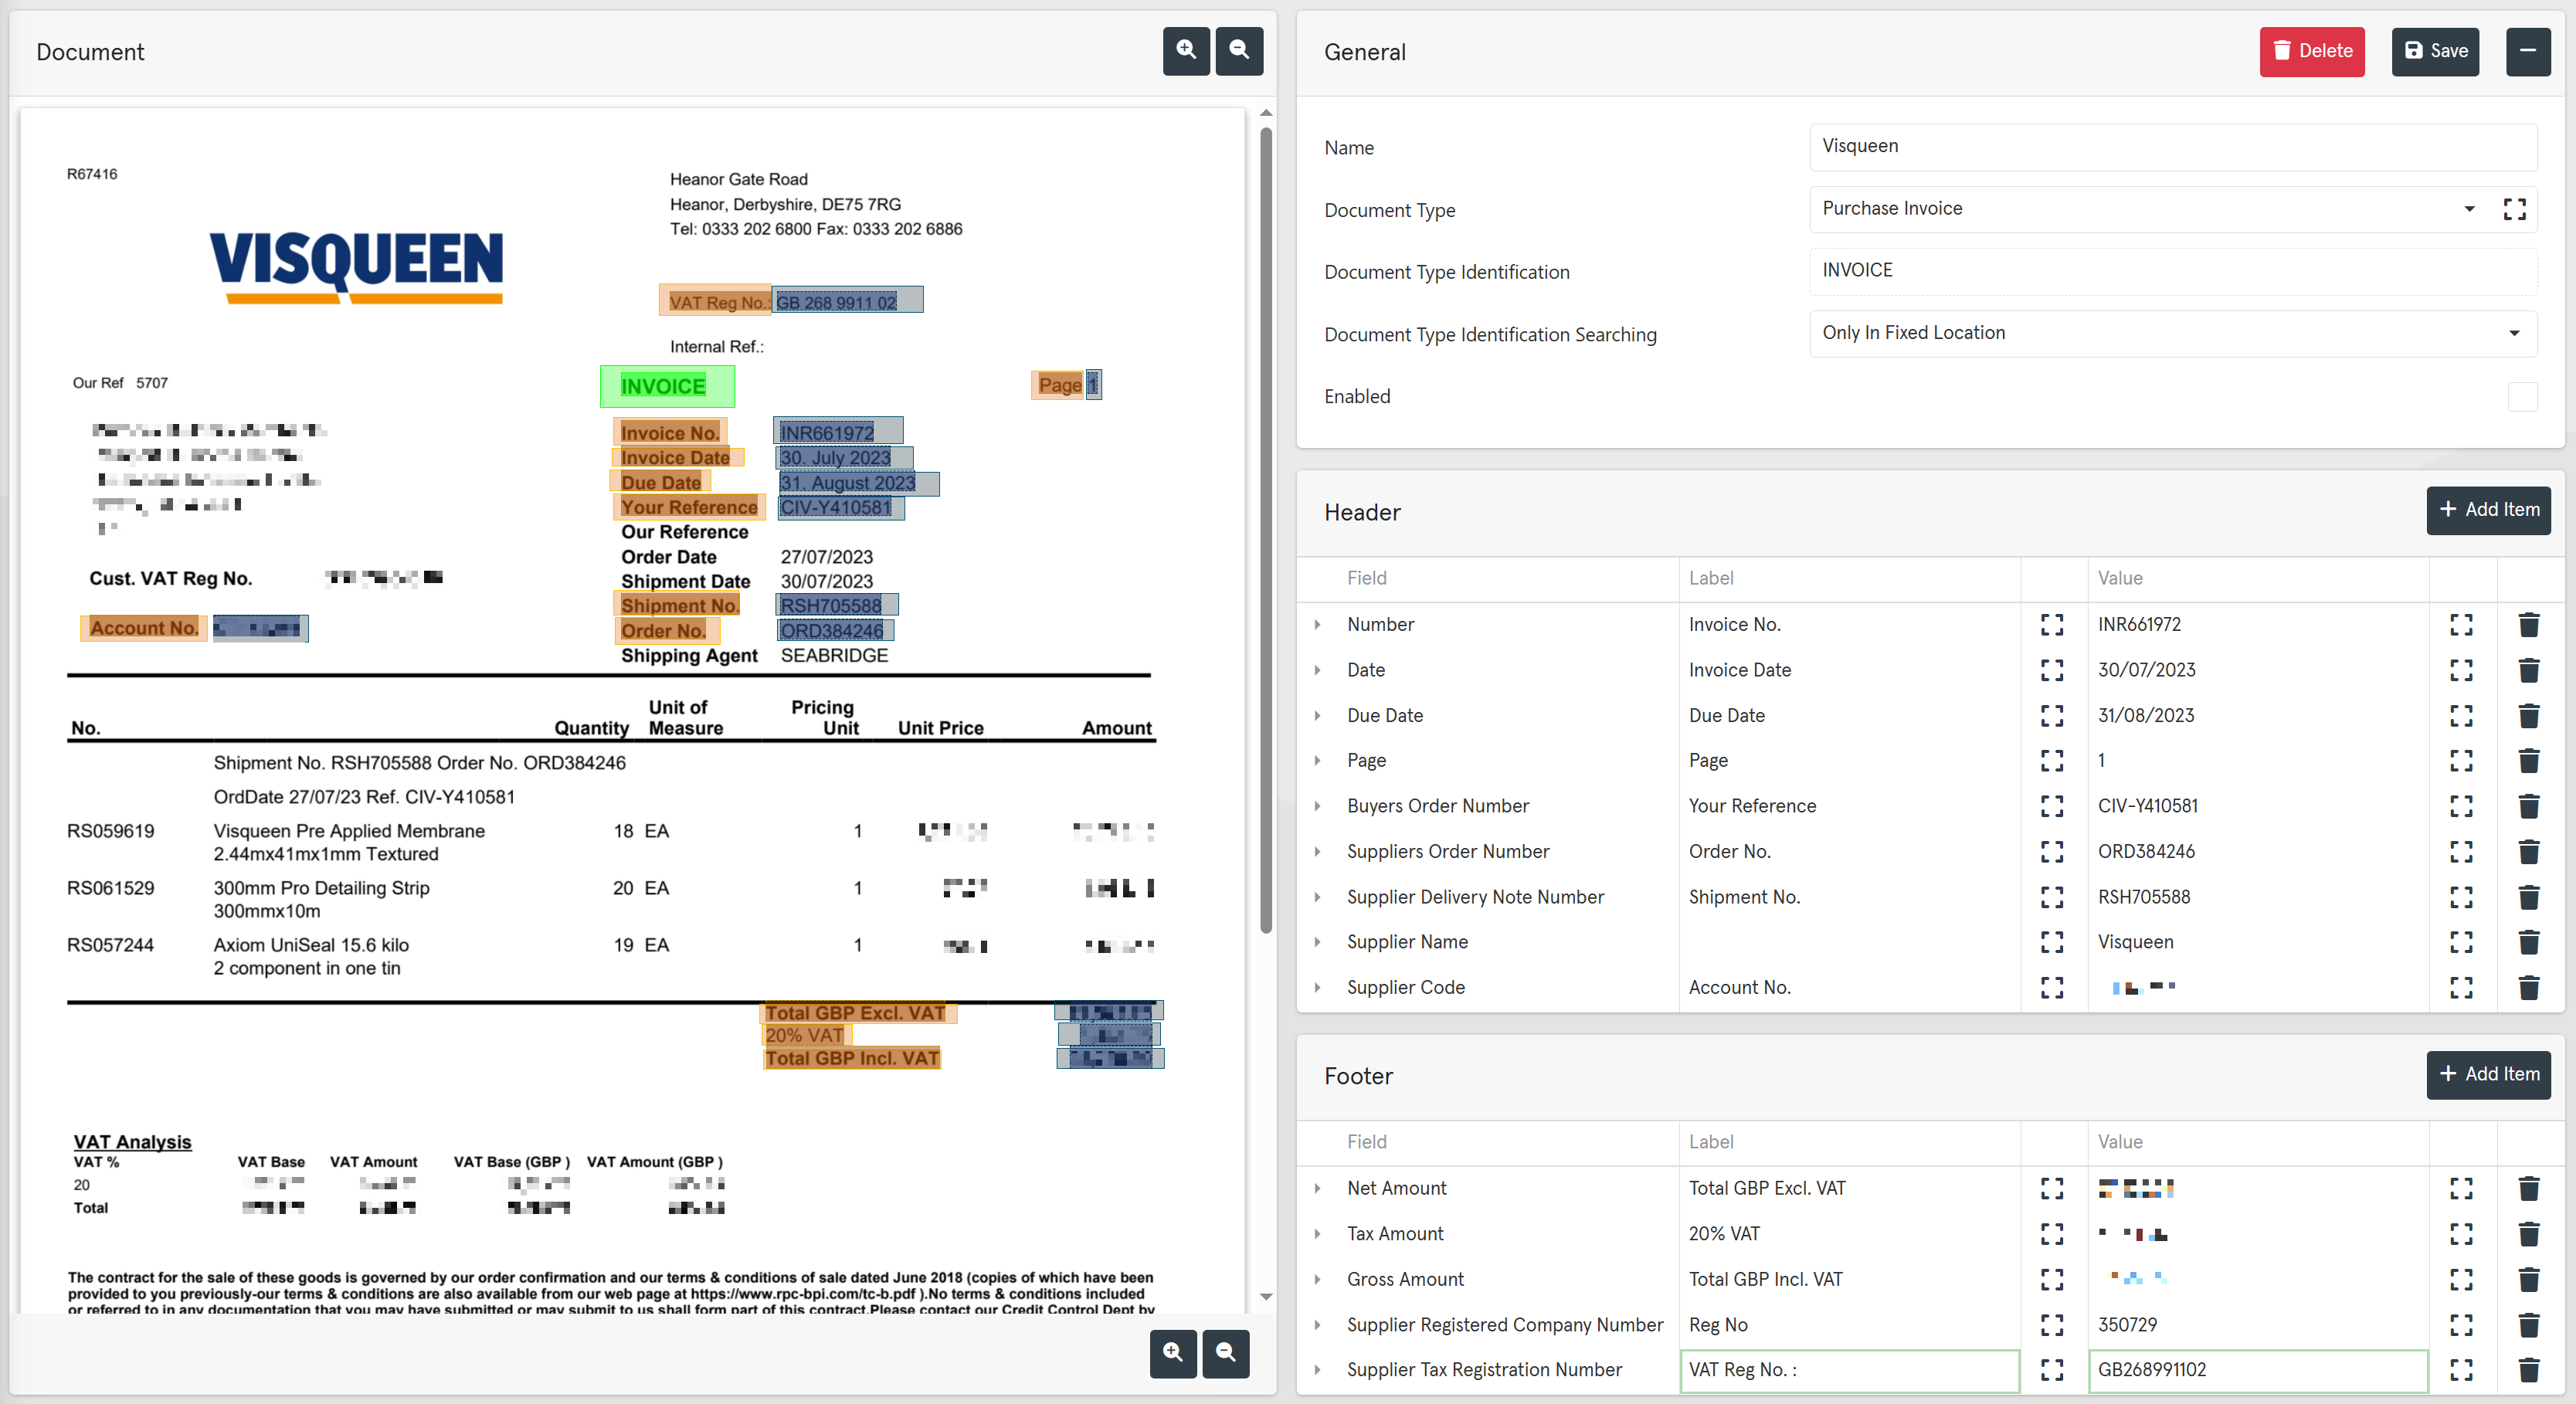
Footer Pane
The Footer Pane layout and configuration is the same as the Header Pane, albeit the Field Names will be different. Refer to the Header Pane section to see how to add new items.
Repeat the process until all relevant fields are set.
If you wish to immediately use the template, ensure that Enabled is ticked in the General Pane.
Once completed click on Save.
Advanced Template Field Controls
These additional Advance Template Configurations will help to mitigate the chances of these problems occurring. However, the use of the fields adds additional checks and verification before the template is used.
Accessing the Advanced Template Field Controls: In the Header and Footer panes, there is an arrow to the left of the field name (highlighted below):

Clicking on the arrow will expand the Advanced Template Field Controls:
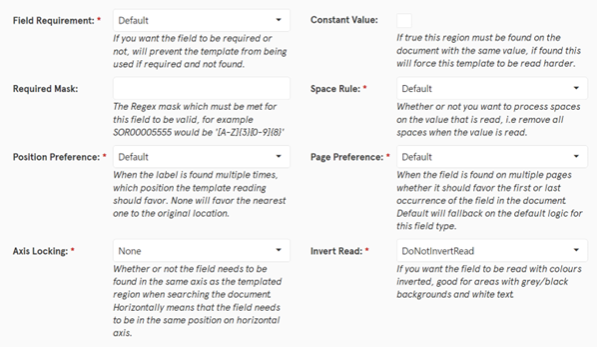
The Advanced Template Field Controls are split into seven areas, and each one will affect how the document is read.
Field Requirement
The settings are:
- Default
- Required Value
- Required Field and Value
- Not Required
These are used to ensure that data is found in the region specified for the Field and/or Value. It does not verify the data. If this is set to Required Value or Required Field and the document finds nothing in the regions, the template will be rejected during processing.
Constant Value
With Constant Value turned on, the information read from the document will be checked against what has been stored on the template. If these do not match, then the template will not be used.
This is essential in ensuring that certain templates get matched correctly. For example, if you had two suppliers who used the same ERP system, and their documents looked identical, setting the Supplier Tax Registration Number to be a Constant Value would increase the chances of matching the document to the correct template.
Required Mask
If your document is having text scraped as opposed to OCR, Regex will not be required.
The Required Mask allows you to use Regex functions to ensure a field is read and sent to iQ correctly. Information regarding Regex (or Regular Expression) functions is readily available on the internet.
As a basic example, you may want to ensure that the Purchase Invoice number is correctly read each time.
Your supplier’s Purchase Invoice number is PLINV1234567890. On occasion, OCR may read an “I” as “1,” a “1” as “l,” or “0” as “O.” Using a Regex command can force the OCR element to only expect certain fields and characters.
In this instance, we are expecting 5 characters (PLINV) and 10 numbers (1234567890), therefore the Regex command [A-Z]{5}[0-9]{10} will work. Split down, this means the first 5 characters must be a letter from A to Z [A-Z]{5} and the last 10 characters must be a number from 0 to 9 [0-9]{10}.
Other examples of Regex:
- [A-Z]{2}[0-9]{6}: 2 uppercase characters followed by 6 digits (AB012345)
- [a-zA-Z]{2}[0-9]{6}: 2 characters followed by 6 digits (ab543210)
- [0-9]{8}: 8 digits (12345678)
- [0-9]{3}/[A-F]{3}: 3 digits followed by ‘/’ followed by 3 uppercase characters (456/ADF)
- POR[0-9]{8}: Starts with “POR” followed by 8 numbers (POR12345678)
Required Masks are not required for Date or Money type values (e.g., Invoice Date and Gross Amount).
Space Rule
This is used to help format data before it’s pushed into Intact iQ.
For example, the document may have a VAT Number of “GB 5676 3058 4,” whereas in Intact you have it saved as “GB567630584.” Having the Space Rule set to “Remove Spaces” will remove spaces during the read to improve matching to the right Supplier.
The settings are:
- Default
- Do Not Remove Spaces
- Remove Spaces
Note that the Company Registration Number and Company Tax Registration number will remove spaces by default.
Position Preference
When the label is found multiple times, you can set which position the template reading should favor.
For example, you may have an invoice with totals that could move up or down the page depending on how many lines there are. There is a risk the Net Goods Total could fall in the same spot as the Net Line Total when the document has increased from two stock items to five.
In this instance, you would set this field to “Bottom” to ensure it reads from the bottom of the page up, reducing the chance of the wrong value being read.
The settings are:
- Default
- None
- Bottom
- Top
None will favor the nearest one to the original location.
Page Preference
When the field is found on multiple pages, you can set whether it should favor the first or last occurrence of the field in the document.
For example, the supplier shows a running total when the document continues over more than one page. Their document designer has given the same name to the running total and the grand total. To ensure the right value is selected, you would want the information from the Last page.
The settings are:
- Default
- First
- Last
Axis Locking
Whether or not the field needs to be found in the same axis as the templated region when searching the document. “Horizontally” means that the field needs to be in the same position on a horizontal axis.
For example, the supplier’s document designer has given the same name to the VAT total and the VAT Registration Number, which are on the same page but in different locations on the horizontal axis. To ensure the right value is selected, you would want to lock the horizontal axis.
The settings are:
- None
- Horizontally
- Vertically
Invert Read
This is specifically used to invert the colors as the document is being read. Using Invert Read will help OCR read white text on a black background. If inAP has used document scraping, Invert Read is not required.
The settings are:
- Do Not Invert Read
- Invert Read Value
- Invert Read Label
- Invert Read Value and Label
The default is “Do Not Invert Read.” The other options depend on whether the Value, Label, or Both are on darker backgrounds.